When you enter Joshua Tree National Park, you may think you’re on a different planet. The roads are surrounded by a vast landscape full of various types of rocks, trees, and cactuses that looks different from anything else you may have seen before. As we drove through the park, I felt in awe and I could not stop staring at everything around me. Get ready for the ultimate three day Joshua tree itinerary!
Joshua Tree is a very large park, larger in fact than the state of Rhode Island. 🤯 There are plenty of areas to explore, hikes to take, and things to see. Due to the vast area that this park encompasses, it may take you a while to drive from place to place. Make sure that you budget time for driving in your plan.
Since Joshua Tree is only a couple hours from San Diego or Los Angeles, it is a common spot for weekend trips. If you only have a few days to explore the park and you love to be active then this three day Joshua Tree itinerary below is perfect.
We went during the winter and it got pretty cold when the sun was not out. We even saw snow! Make sure that you are prepared for the weather and if you are there in the summer that you are packing a lot of water.

JOSHUA TREE IN A NUTSHELL
Short on time? Read this quick overview for your trip to Joshua Tree with everything you need to know!
- Getting there: The closest airports to Joshua Tree are Palm Springs (PSP) and Los Angeles (LAX). You can find cheap flights here
- Entrance Fee: $30 for a personal vehicle or use the America the Beautiful Pass
- Where to Stay: Camp in the park, stay at Field Station Joshua Tree, or look at VRBOs.
- How to Get Around: There are buses in town, but the easiest way to get around is to rent a car
- Best Time to Visit: Spring or Fall
- Things to Do: Visit the Ocotillo Patch, go on a hike, or drive on the scenic road
Planning Your Joshua Tree Trip
How to Get to Joshua Tree

Joshua Tree is a great place to visit and it’s an easy park to add to a California road trip. It’s just two hours from LAX and one hour from the Palm Springs Airport. So, you can choose to fly into either.
Once you fly in, then you will need a car to drive from the airports and throughout the park!
Things to Know Before You Go
💵 Joshua Tree costs $30 for a private vehicle that covers 7 day. You can also use any of the annual passes like the America the Beautiful Pass to get in.
☀️ The sun is really strong in Joshua Tree. Make sure that you pack plenty of water and avoid hiking during the heat of the day during the summer months.
⛺️ There are five campgrounds in Joshua Tree and they require reservations. You can make them up to six months in advance.
🦮 Pets are not allowed on hikes or in the backcountry. They are allowed on a leash in parking lots, campgrounds, and picnic areas.
⚠️ Joshua Tree has seasonal climbing closures to protect nesting raptors. Otherwise, stay updated on the website for more openings.
🍃 Remember to follow the Leave No Trace Principles. As always, you want to leave nature looking better than you found it.
Best Time to Visit Joshua Tree

Joshua Tree is a wonderful place to visit for much of the year, but summer can be exceptionally hot. So, the best times to visit are from the fall through the spring.
In fall and spring, you will see colors start to come out in the park with beautiful yellows in the fall and gorgeous wildflowers blooming in spring. In the winter, expect for it to get much colder. We even saw snow on our visit! ❄️
Temperatures can soar into the high 90s and 100s in the summer. 🥵 So, you will want to avoid exploring during the mid-day and pack plenty of extra water!
Getting Around Joshua Tree

Joshua Tree is the size of Rhode Island, which means there is a large distance to cover! So, the best way to get around is to rent a car. I suggest using Discover Cars because they compare car prices among all the competitors to find the cheapest deals.
Where to Stay in Joshua Tree

Joshua Tree has a bunch of cute and quirky places to stay. There are a few hotels in the area, but I suggest renting a unique VRBO or camping instead! You can stay at one of the five campgrounds in the park or check out out free campsites nearby.


I’ve stayed in Twentynine Palms in a tipi and in Joshua Tree in a adorable VRBO. There are tons of wonderfully unique glamping options. So, you can stargaze 💫 and enjoy the amazing landscape around you with these cool VRBO offerings.
If you want to stay in a hotel, then I recommend Field Station Joshua Tree!
Packing for Joshua Tree

While the desert is hot and sunny during the day, the air becomes cool at night. So, you will want to pack layers for your trip to stay warm. When we visited in the winter, I even needed gloves and a hat.
But, no matter what time of year you visit you’ll want to bring extra water. The park recommends each person having a gallon a day with them. It can be easy to get dehydrated when you’re in the desert!
Packing List for Joshua Tree
- Comfortable Hiking Boots
- Day Pack
- Water Reservoir
- 2 Liters of Water per person
- First Aid Kit
- Sunscreen
- Bug Spray
- Headlamp
- Light jacket
- Base Layer
- Good Hiking Pants/Bottoms
- Winter Hat (Winter)
- Gloves (Winter)
- Satellite phone
Joshua Tree Itinerary
Now that you have figured out how to plan your trip it’s time to get into the itinerary! This is the perfect way to spend three days exploring Joshua Tree.
Joshua Tree 3 Day Itinerary Quick Overview

Day 1:
- Cholla Cactus Garden and Ocotillo Patch
- Arch Rock
- Jumbo Rock and Skull Rock
- Barker Dam
- Hidden Valley Nature Trail
Day 2:
Day 3:
Day One in Joshua Tree
You should start your trip early in the day in order to fit in as much as you can. ⏰ On the first day we entered through the North Entrance Station, which is located near the town of Twentynine Palms. We wanted to get the furthest drive out of the way and work our way back towards the entrance for the night.
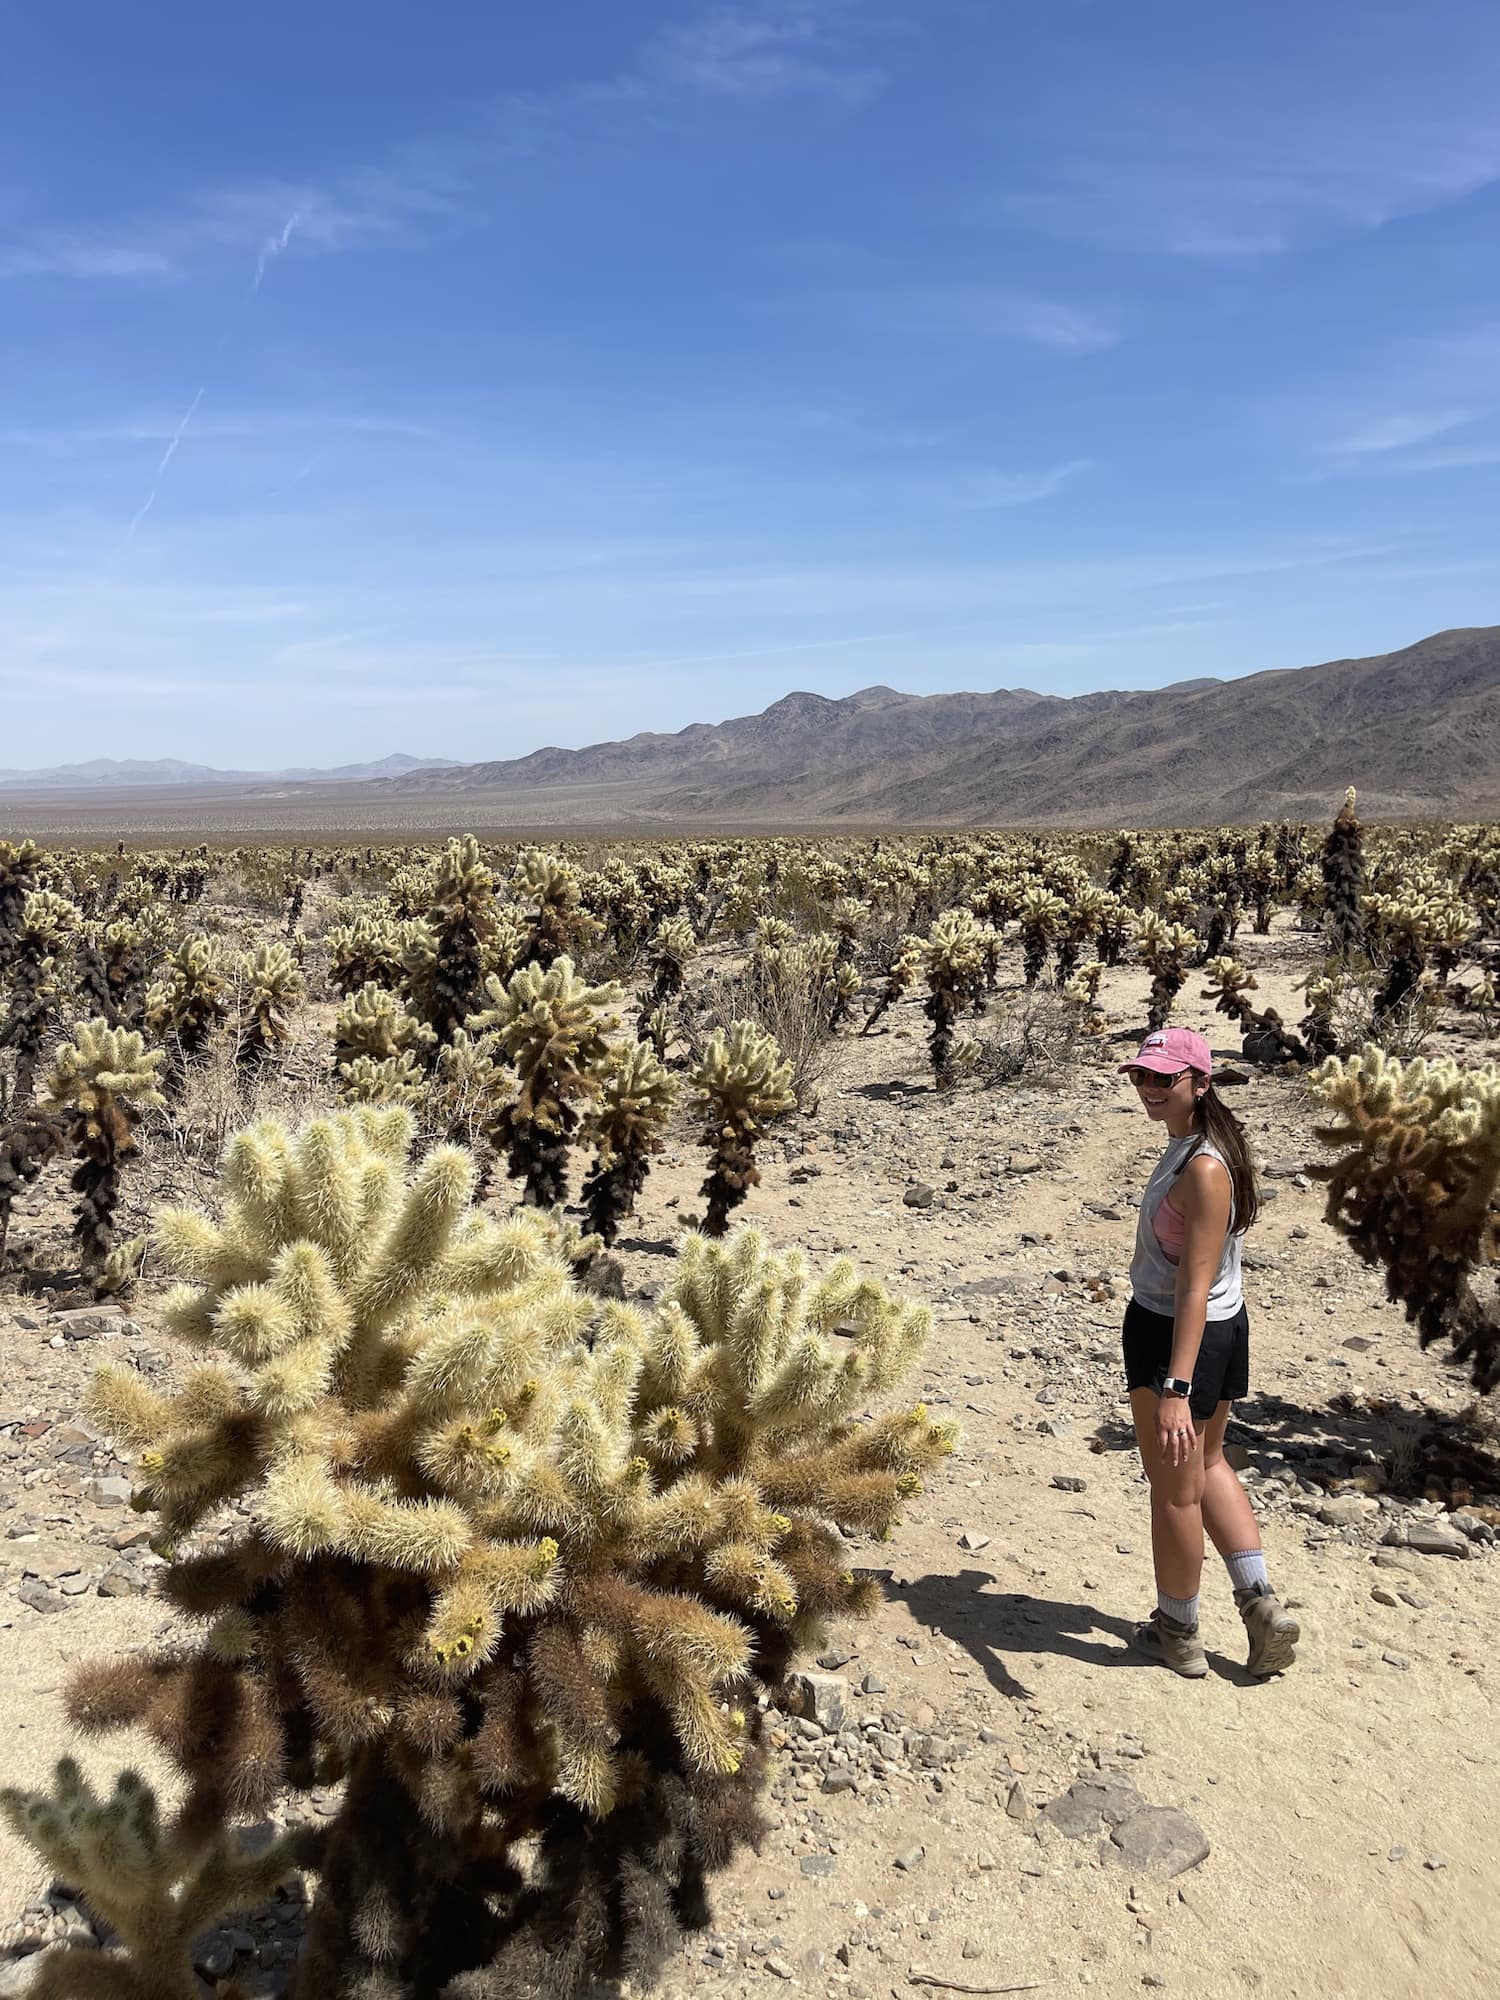
Cholla Cactus Garden and Ocotillo Patch


If you go down the Park Boulevard, you will get to the Cholla Cactus Garden and past that is Ocotillo Patch. The Cholla Cactus Garden is a valley full of small little cactuses where you can walk through the trails and take lots of pictures.
Watch out though! These cactuses will poke your skin at the slightest touch and unfortunately for us, we were victims to these little fellows. 🌵
When you continue down the boulevard you will get to the Ocotillo Patch. There you will see the tall Ocotillo trees. We stopped quickly here before turning around to see more of the park.
Arch Rock

On the way back from the Cactus Garden, you will see the stop for Arch Rock. The trail itself is only .7 miles to the arch rock and back. The arched rock actually sits on top of another large boulder and it’s cool to see. There are also plenty of rocks along the way that you can have fun climbing over if you enjoy bouldering.
Jumbo Rock and Skull Rock


After Ocotillo Patch, you can turn around and make your way to the Jumbo Rocks area of the park. Before you reach the Jumbo Rock campground, you will see Skull Rock on your left. The Skull Rock is a large rock that eroded over time and now resembles a skull. People love to take pictures of themselves walking in front of the eye or nose.
This is a very popular spot to stop in the park, and so you may struggle to find parking! 🚗
If you continue past the rock itself, there is a 1.7 mile trail that you can take around this area. The hike provides beautiful landscapes of the surrounding area and you can scramble over various rocks. It is an easy hike and it’s worth the time.
After Skull Rock, you can visit the Jumbo Rocks Campground where there a series of boulders. If you enjoy climbing around, this would be a fun spot to try it!
Barker Dam

There are still more hikes to do on the first day! Barker Dam is not far from Skull Rock and this is your rare chance to actually see water in the park. The trail itself is a 1.8 loop and it is easy.
There is plenty of gorgeous flora to look at on the way and it’s a very serene hike. Depending on the time of year, the dam itself may not be full of water, despite that, the hike is beautiful. Also, it’s a wonderful place to take in a sunset!
Hidden Valley Nature Trail


This is the last hike of the day on this Joshua Tree itinerary! Hidden Valley Nature Trail is a one mile loop that features boulders and lovely flowers. It’s a popular spot and so it may be crowded. We went for sunset and we saw people of all ages and abilities.
There are spots where you can rock climb and find easily find your way back to the trail. There are also Joshua Trees located by the entrance to this hike. It’s a great way to end the day!
Day Two
Lost Horse Mine and Ryan Ranch

Both of these hikes are very easy and will not take you too long. They allow you to explore the history of this area. This mine was used during the Gold Rush period and they have plenty of signs to tell you more about the period there.
Ryan Ranch is an adobe house that used to shelter the Ryan family that built the Lost Horse Mine. It feels like you are traveling back in time when you go through these places!
Ryan Mountain for Sunset


I had been looking forward to the Ryan Mountain hike the whole trip and it did not disappoint. The trail is 3 miles out and back, however, the whole way there is completely uphill so it can be difficult. When you get to the top of the mountain you can see for miles through the desert. 🤩
You should try to aim to get to the top before the sunset, so that you can watch as the sun goes down. If you are doing this hike in the winter, make sure that you pack warm clothes. It’s very windy at the top! You will also want to bring a headlamp for the way back down, because at that point it will be dark.
Joshua Tree Saloon

No trip to Joshua Tree is complete without a trip to the Joshua Tree Saloon. You may be tired on the first night and then you could do this a different night. My friend and I were there for New Years Eve and so of course we had to spend the night at the saloon. The bar itself has good burgers and live music. 🎶 It’s a fun way to end your night with a drink and a great atmosphere.
Day Three in Joshua Tree
Fortynine Palms or Twentynine Palms

We really wanted to see the palm trees in Joshua Tree, but we did not have time for the 7 mile Lost Palms Oasis trail. Luckily, you can drive to the Fortynine Palms trail, which is a 3 mile out and back hike near Twentynine Palms.
The hike begins with a steep walk up, before you descend into a valley that will lead you to the oasis. The oasis features towering palm trees, pools of water, and various wild flowers. 🌸 You can really feel that you are in the desert on this hike. There is not a lot of shade along the hike, so make sure that you pack enough water and wear sunscreen.
Joshua Tree Town


On our way out of the park, we stopped for lunch and to walk through town for a bit. There are plenty of wonderful restaurants, cute shops, and interesting things to see along the way.
Plus, you have to stop by the visitor center and gift store for Joshua Tree on your vist. There were cute art installations and a funny statue garden that we found. The town is very quirky and I encourage you to spend a bit of time there exploring.
Final Tips for Visiting Joshua Tree

I’ve visited Joshua Tree on three different occasions now and each one was a joy! This landscape is incredibly unique and dreamy. Just make sure to prepare for long drives, pack layers, and download your maps before you visit. If you do that then you’ll have a wonderful time on your three day Joshua Tree itinerary!
Let me know if you found this Joshua Tree guide helpful!
Similar Posts to Explore
📌 Pin The Great Joshua Tree Itinerary to Pinterest